this is a series of samples I did for a workshop I gave in Paris on january the 12th 2012 (see the previous article).
everything went fine, mostly due to the people that came.
thank you all, it was a very pleasant time :)
the backbone of the workshop was geometry, dynamic mesh generation and manipulation.
the first part reviewed the basics ; starting from the theory – creating and manipulating the Vector3D & Matrix3D – we saw how to build geometry from scratch, how to distort geometry and how to plug it on a soundspectrum.
then we saw some “advanced techniques” to compute meshes: the 2D section, linear extrusions, the lathe and finally the loft objects (or path sweeping).
I’ll address the advanced techniques later ; for now we’ll focus on the basics.
I tried to remain so API agnostic as possible yet to have something to show, I needed a 3D engine. I chose Away3D but most of what will be shown here is not using any specific feature of Away3D so consider using ANY opensource engine.
here’s a list for your convenience:
also, I don’t use the dev branch of the engine. it would be a wise choice though for a king in the north is fiercely fighting to bring the engine to a beta version. it would allow us to use the latest features, cleaner and more stable code. In the zip below, I’ve embedded a snapshot of the version I used, I’ll leave it a s an exercise to adapt the sources to the next releases of the engine.
before we start, here’s a zip file of the sources. it’s a FlashDevelop project but the attendees managed to compile from various platform / OS. another thing I did for the workshop is a 3D cheat sheet ; a PDF file that highlights graphiclly some principles and handy methods.
so, hereunder you’ll find a series of snapshots, click on them to see a live example, the name underneath indicates the class’ location in the src folder, the source link let you access the source code directly. I massively commented the sources in english mostly because 3 attendees over 11 were not french (bless them once more). it might not look exactly as the picture but it’s the very same principle.
the template
all the examples extend a template called BaseScene in the triga package. the original was done by Darcey Lloyd (Darcey) https://github.com/DarceyLloyd his website: http://www.allforthecode.co.uk/ and the original template can be found here:https://github.com/away3d/away3d-core-fp11/issues/152
this is a simple instanciation, nothing spectacular (click class name).
_template.Template :: source
this is a sample scene with dirtily created meshes, that uses the default lights and materials and a couple of hidden variables to help quickly build a 3D scene. by default there’s a HoverController camera ( or ArcBall camera ), just click & drag to rotate around the model.
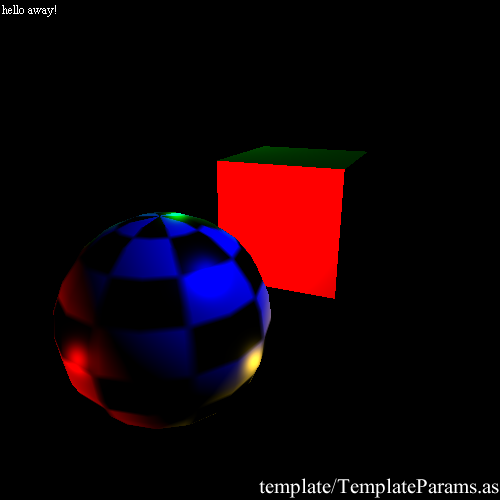
_template.TemplateParams :: source
theory
reviewing the basics never hurts and I learnt a lot while doing these examples.
here we notice 2 important things: the Vector3D has a 4rth parameter : W, and most importantly, it helps us vizualize that a Vector is a position AND a direction ; an axis.
while preparing my workshop, I crossed this article Architecture of Coral vs Vector3D and Matrix3D where the difference between a position and a direction is made very clear.
I also used some of his snippets to perform manual Matrix transform, very interesting blog.
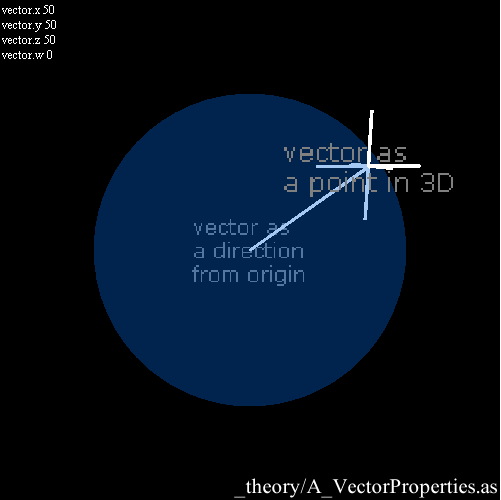
geometry._theory.A_VectorProperties :: source
so, as we have Vectors, we can do some basic operations. not many actually, everything boils down to something like this:
add(a:Vector3D):void {x+=a.x; y+=a.y; z+=a.z;}
subtract(a:Vector3D):void {x-=a.x; y-=a.y; z-=a.z;}
negate():void {x=-x; y=-y; z=-z;}
scale( s:Number ):void { x*=s; y*=s; z*=s;}
dot( a:Vector3D ):Number { return x*a.x+y*a.y+z*a.z;}
crossProduct( a:Vector3D, b:Vector3D ):Vector3D{ return new Vector3D( a.y*b.z-a.z*b.y, a.z*b.x-a.x*b.z, a.x*b.y-a.y*b.x); }
length():Number { return Math.sqrt(x*x+y*y+z*z);}
normalize():void { scale(1/length());}
they’re all implemented in the native Vector3D with some variations in the signatures and apart from negate() (that inverts the direction of the vector) they’re all used in the example below.
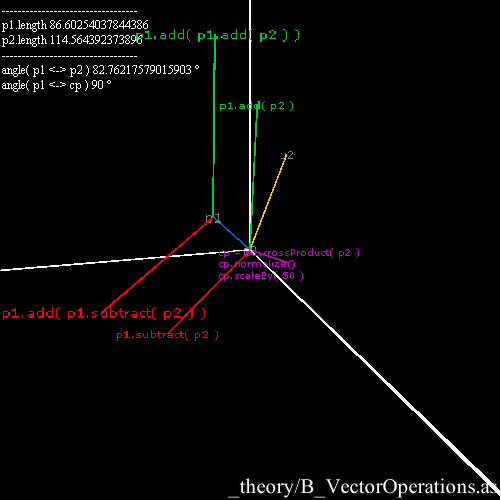
geometry._theory.B_VectorOperations :: source
now this becomes more interesting, the following samples address the Matrix3D object and how to use it. basically, a Matrix3D is a linear array of values. to “apply” a Matrix, we multiply it with another Matrix3D or with a Vector3D. this is a rather tricky operation to do by hand ( see the 3D cheatsheet to understand better ).
a class called C_MatrixMultiply in _geometry/_theory develops the Matrix – Matrix multiplication and it looks like this:
private function multiply(a:Matrix3D, b:Matrix3D):Matrix3D
{

	var a0:Number = a.rawData[ 0 ];
	var a1:Number = a.rawData[ 1 ];
	var a2:Number = a.rawData[ 2 ];
	var a3:Number = a.rawData[ 3 ];
	var a4:Number = a.rawData[ 4 ];
	var a5:Number = a.rawData[ 5 ];
	var a6:Number = a.rawData[ 6 ];
	var a7:Number = a.rawData[ 7 ];
	var a8:Number = a.rawData[ 8 ];
	var a9:Number = a.rawData[ 9 ];
	var a10:Number = a.rawData[ 10 ];
	var a11:Number = a.rawData[ 11 ];
	var a12:Number = a.rawData[ 12 ];
	var a13:Number = a.rawData[ 13 ];
	var a14:Number = a.rawData[ 14 ];
	var a15:Number = a.rawData[ 15 ];


	var b0:Number = b.rawData[ 0 ];
	var b1:Number = b.rawData[ 1 ];
	var b2:Number = b.rawData[ 2 ];
	var b3:Number = b.rawData[ 3 ];
	var b4:Number = b.rawData[ 4 ];
	var b5:Number = b.rawData[ 5 ];
	var b6:Number = b.rawData[ 6 ];
	var b7:Number = b.rawData[ 7 ];
	var b8:Number = b.rawData[ 8 ];
	var b9:Number = b.rawData[ 9 ];
	var b10:Number = b.rawData[ 10 ];
	var b11:Number = b.rawData[ 11 ];
	var b12:Number = b.rawData[ 12 ];
	var b13:Number = b.rawData[ 13 ];
	var b14:Number = b.rawData[ 14 ];
	var b15:Number = b.rawData[ 15 ];


	var c:Matrix3D = new Matrix3D();

	c.rawData = Vector.<Number>([	a0 * b0 + a1 * b4 + a2 * b8  + a3 * b12,
									a0 * b1 + a1 * b5 + a2 * b9  + a3 * b13,
									a0 * b2 + a1 * b6 + a2 * b10 + a3 * b14,
									a0 * b3 + a1 * b7 + a2 * b11 + a3 * b15,

									a4 * b0 + a5 * b4 + a6 * b8  + a7 * b12,
									a4 * b1 + a5 * b5 + a6 * b9  + a7 * b13,
									a4 * b2 + a5 * b6 + a6 * b10 + a7 * b14,
									a4 * b3 + a5 * b7 + a6 * b11 + a7 * b15,

									a8 * b0 + a9 * b4 + a10 * b8  + a11 * b12,
									a8 * b1 + a9 * b5 + a10 * b9  + a11 * b13,
									a8 * b2 + a9 * b6 + a10 * b10 + a11 * b14,
									a8 * b3 + a9 * b7 + a10 * b11 + a11 * b15,

									a12 * b0 + a13 * b4 + a14 * b8  + a15 * b12,
									a12 * b1 + a13 * b5 + a14 * b9  + a15 * b13,
									a12 * b2 + a13 * b6 + a14 * b10 + a15 * b14,
									a12 * b3 + a13 * b7 + a14 * b11 + a15 * b15		]);
	return c;

}
indeed not something you’d really go for manually :)
most of the time we need to multiply a Vector3D by a Matrix which boils down to:
//this will be our output position
var v:Vector3D = new Vector3D();

//we grab the position of the 3d object
var p:Vector3D = manualTransform.position;

//then we grab the raw data of the matrix3D
var raw:Vector.<Number> = mat.rawData;

//and perform a Matrix multiplication between the P vector and the transform matrix
v.x = raw[0] * p.x + raw[4] * p.y + raw[8] * p.z + raw[12] * p.w;
v.y = raw[1] * p.x + raw[5] * p.y + raw[9] * p.z + raw[13] * p.w;
v.z = raw[2] * p.x + raw[6] * p.y + raw[10] * p.z + raw[14] * p.w;
v.w = raw[3] * p.x + raw[7] * p.y + raw[11] * p.z + raw[15] * p.w;

//TADA ! V is the result of our matrix transform.
this method is wrapped natively in the Matrix3D.transformVector() method.
here’s an example:
![]()
geometry._theory.D_MatrixTransform :: source
as Matrix multiplication is not commutative, this one emphasizes the importance of the order in which we perform the operations. it briefly illustrates the append / prepend difference.
geometry._theory.E_AppendPrepend :: source
this shows how to perform a translation and a scaling by hand ; by entering the ratios directly into the Matrix.
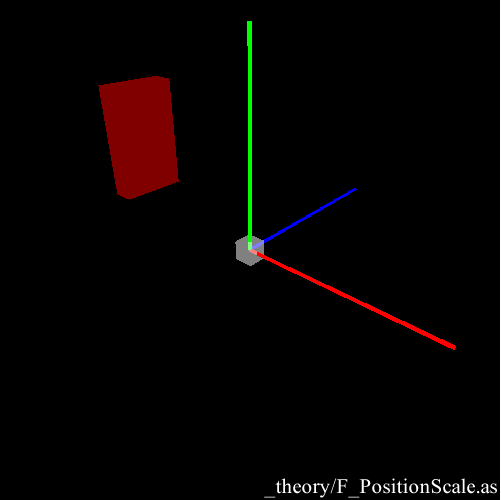
geometry._theory.F_PositionScale :: source
the matrix rotation is one of the most useful and complex operations (as compared to scaling and translation).
this explains the logic behind it and shows a rotation done by hand and by using the Matrix3D built-in methods.

geometry._theory.G_MatrixRotation :: source
this shows how to rotate an object on its local axis to combine rotations. the object rotates on the white disc, targets (pointAt) the blue object and also rotates locally on one of its axes. it could help build some Forward or Invert Kinematics systems.

geometry._theory.H_LocalRotation :: source
this is a simple comparison of a Quaternion and a Matrix3D, it helps understand that they’re very close to each other.
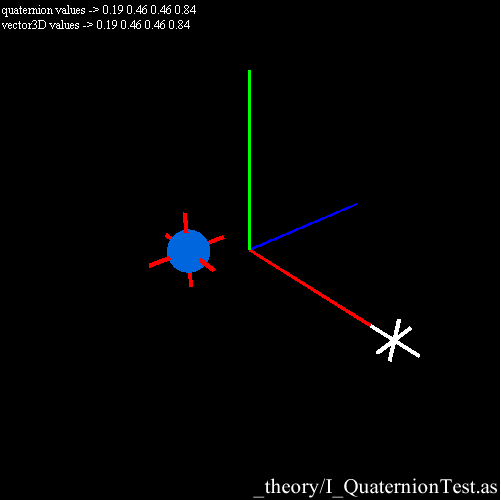
geometry._theory.I_QuaternionTest :: source
this is a Spherical interpolation ( SLERP for short ) done both with a Quaternion and a Matrix3D. note that the matrix transform(blue sphere) is not handling the angles the same way as the Quaternion (red tick) does.
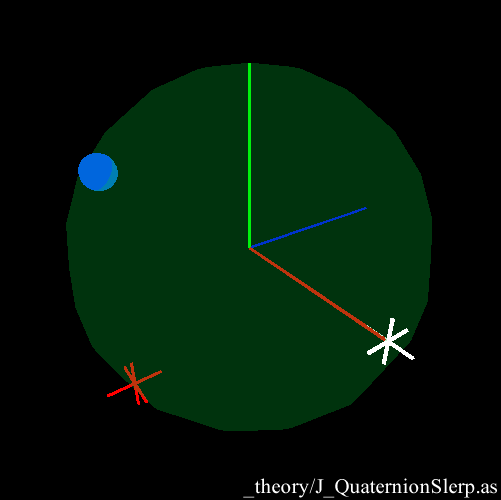
geometry._theory.J_QuaternionSlerp :: source
this is a mouse unprojection: it’s a technique that allows us to create a 3D line from the “eye” (camera) to the “finger” (mouse position). even if there must be a better way, it’s very useful for picking or shooting. this example places a mesh at the mouse location when you hit a key.
geometry._theory.K_UnprojectMouse :: source
in this snippet I use the “eye-finger” 3D line and I test it against a sphere. if the line hits the sphere, I use the ends of the segment to reset the Quaternions and the Matrices and make a SLERP between 2 locations.
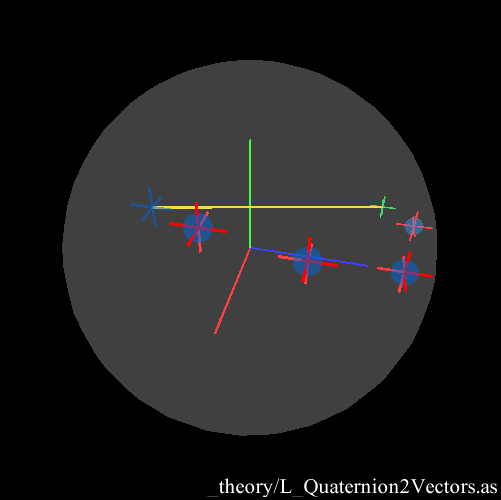
geometry._theory.L_Quaternion2Vectors :: source
basics
the goal of the workshop was indeed to generate and manipulate geometry. so let’s dive into it :)
by default all the engines offer some primitives models, here’s a list of the ones Away3D offers.
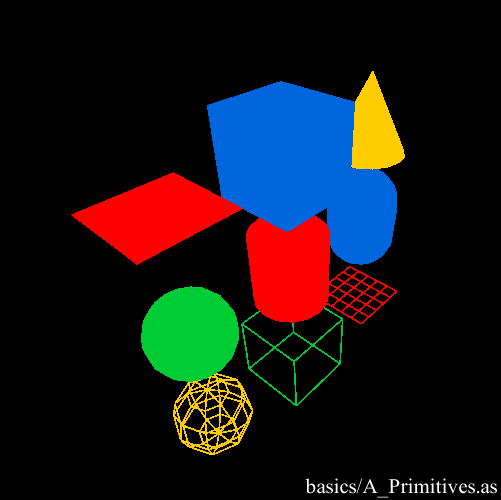
geometry.basics.A_Primitives :: source
now the nifty part: our first custom geometry built from scratch \o/
again, check the 3D cheat sheet if you’re not at ease with concept of VertexBuffer/indexBuffer.
it’s a single sided plane in 3D.

geometry.basics.B_CustomGeometry :: source
so as we know how to build a plane and how to unproject a 2D point. we can combine them together to create the view plane in the 3D space. hit anay key to create the view plane (what the camera sees) in the 3D space then move around.
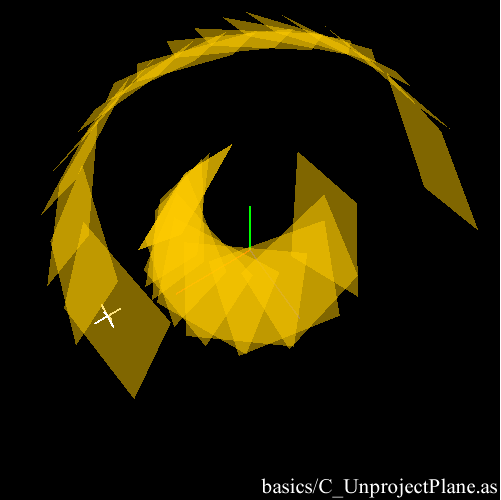
geometry.basics.C_UnprojectPlane :: source
this simply shows how to build a cube in a more compact way.
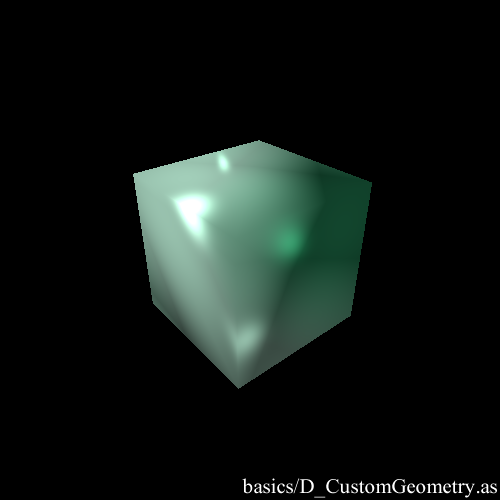
geometry.basics.D_CustomGeometry :: source
an interesting possibility when we can access the vertex coordinates is that we can alter them and then update the mesh. in this case, the longer you press the mouse, the more offset the vertices will get. when you release, they go back to their origin.
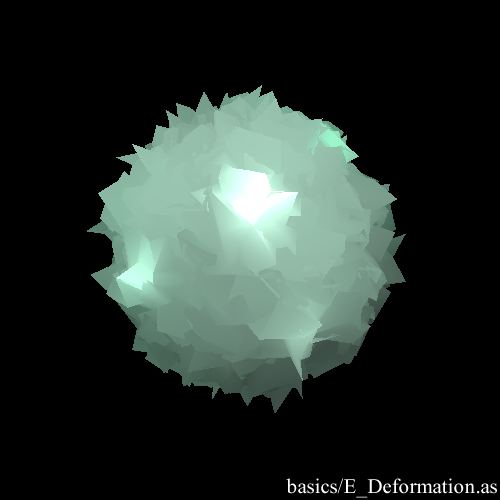
geometry.basics.E_Deformation :: source
this simply shows how to load a mesh
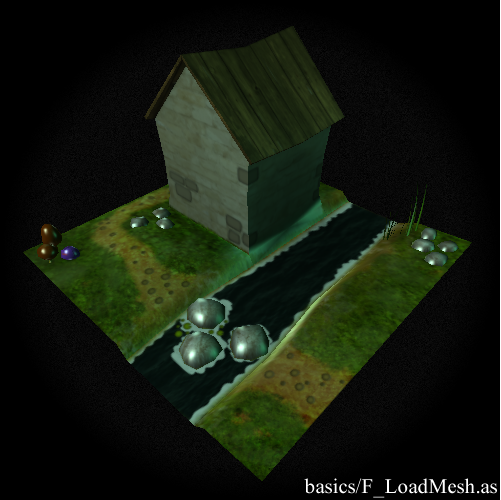
geometry.basics.F_LoadMesh :: source
as long as we have access to the vertex data, we can deform any mesh, in that case, the mesh we’ve loaded previously.
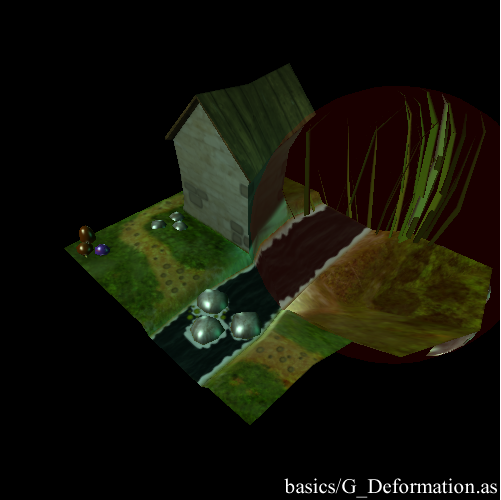
geometry.basics.G_Deformation :: source
and finally, a popular way of distorting meshes is the SoundSpectrum so here’s one.
I can’t find where the sound comes from so if anyone has a clue and if I’m breaking some compyrights, please let me know.
I’m extremely proud of this one ; it has to be the most expressive Spectrum I’ve done in my life or is it just the music that makes it so cool, I don’t know. it almost seems alive :D
oh and it uses a convex hull to close the mesh.
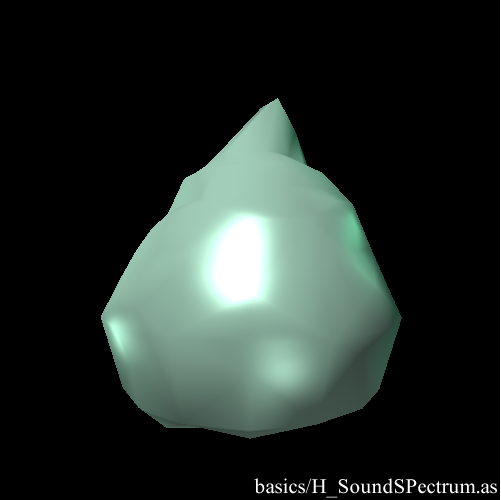
geometry.basics.H_SoundSPectrum :: source
curves
ok, so this is a bit off topic, one of the first things I’ve done when I started playing with 3D is Curves. it’s both useful and beautiful. off topic, because it uses a simplified version of the Loft class playfully called Spline and that we’ll study in the next article. here’s a simple example where a curve is built from the vertices of a mesh then smoothed with a Cubic method.
geometry.curves.A_SimpleSpline :: source
and this is a comparison between the 3 types I’ve implemented ; Cubic, CatmullRom and Cardinal. I had already addressed the topic in 2D here. a good thing with these curves is that they’re N dimensional, understand that if you find out how to render them, you could build 18th dimensional curves.
geometry.curves.B_SplineTypes :: source
finally this is a combination between mesh generation and curves ; I use a smoothing curve to create some vertices inside each face of a mesh then rebuild the indices. a detailed how to is located at the bottom right of the 3D cheat sheet
geometry.curves.C_subdivisions :: source
an here’s a series of tests on materials more info here.
( comments in French )
materials.A_Colormaterial :: source
materials.B_DefaultTextures :: source
materials.C_Bitmapmaterial :: source
materials.D_GradientMaterials :: source
materials.E_PatineTextures :: source
materials.F_Skybox :: source
materials.G_ViewHelperTest :: source
ok, so that was it for the first part.
I hope you’ll find it useful.
enjoy :)
my beloved readers wrote…